This article will walk you through how to sign a Site Document in Gather 2.0.
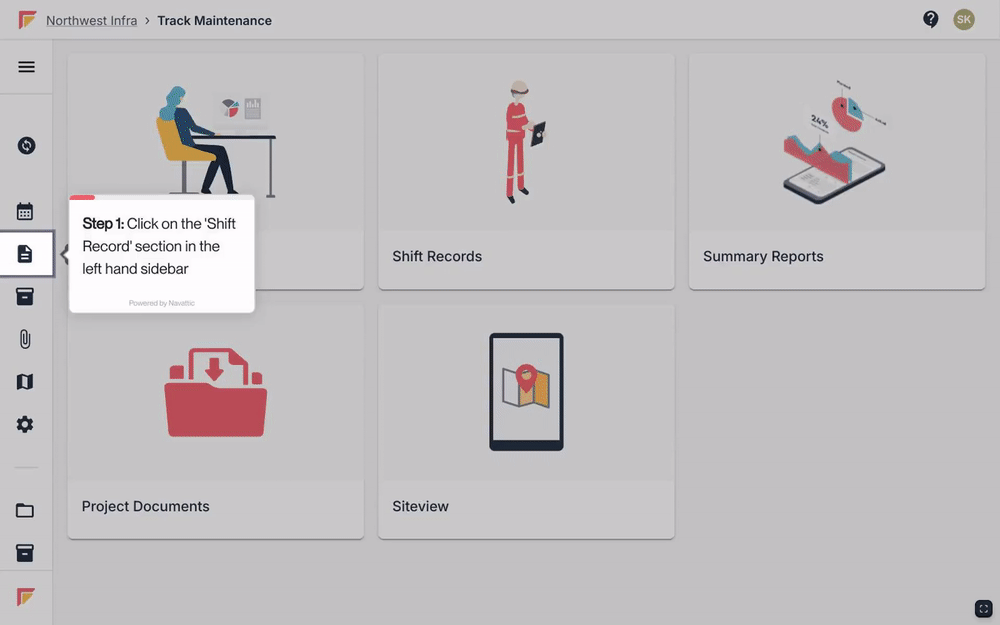
First, navigate to the Shift Record that you want to sign a Site Document for.
Click 'View Documents' in the top left of the Shift Record to see all the documents uploaded to the shift.
Click on the three dot menu to the far right of the document you want to sign and click 'View and sign'.
Click 'Sign' in the bottom right of the screen.
Select or enter your name and competency number.
Create a signature using your mouse or touchscreen.
After reading the disclaimer at the bottom of the screen, click 'Accept and sign’.
To see a list of signatures attached to a particular Site Document, click on the Shift Record the document has been added to.
From here, click on the 'View Documents' button at the top right of the screen.
Next, click on the document to open it.
You will now see a preview of the document, with the option to 'View Signatures' in the bottom right-hand corner of the screen.
Click on 'View Signatures'.
To view every signature attached to a particular Site Document in one download, click on the Shift Record that the document is assigned to.
From here, click on the 'View Documents' button at the top right of the screen.
Next, click on the three dot menu to the right of the relevant document and choose 'Download Signed'.
