This article runs through the basics of using our Shift Planner tool.
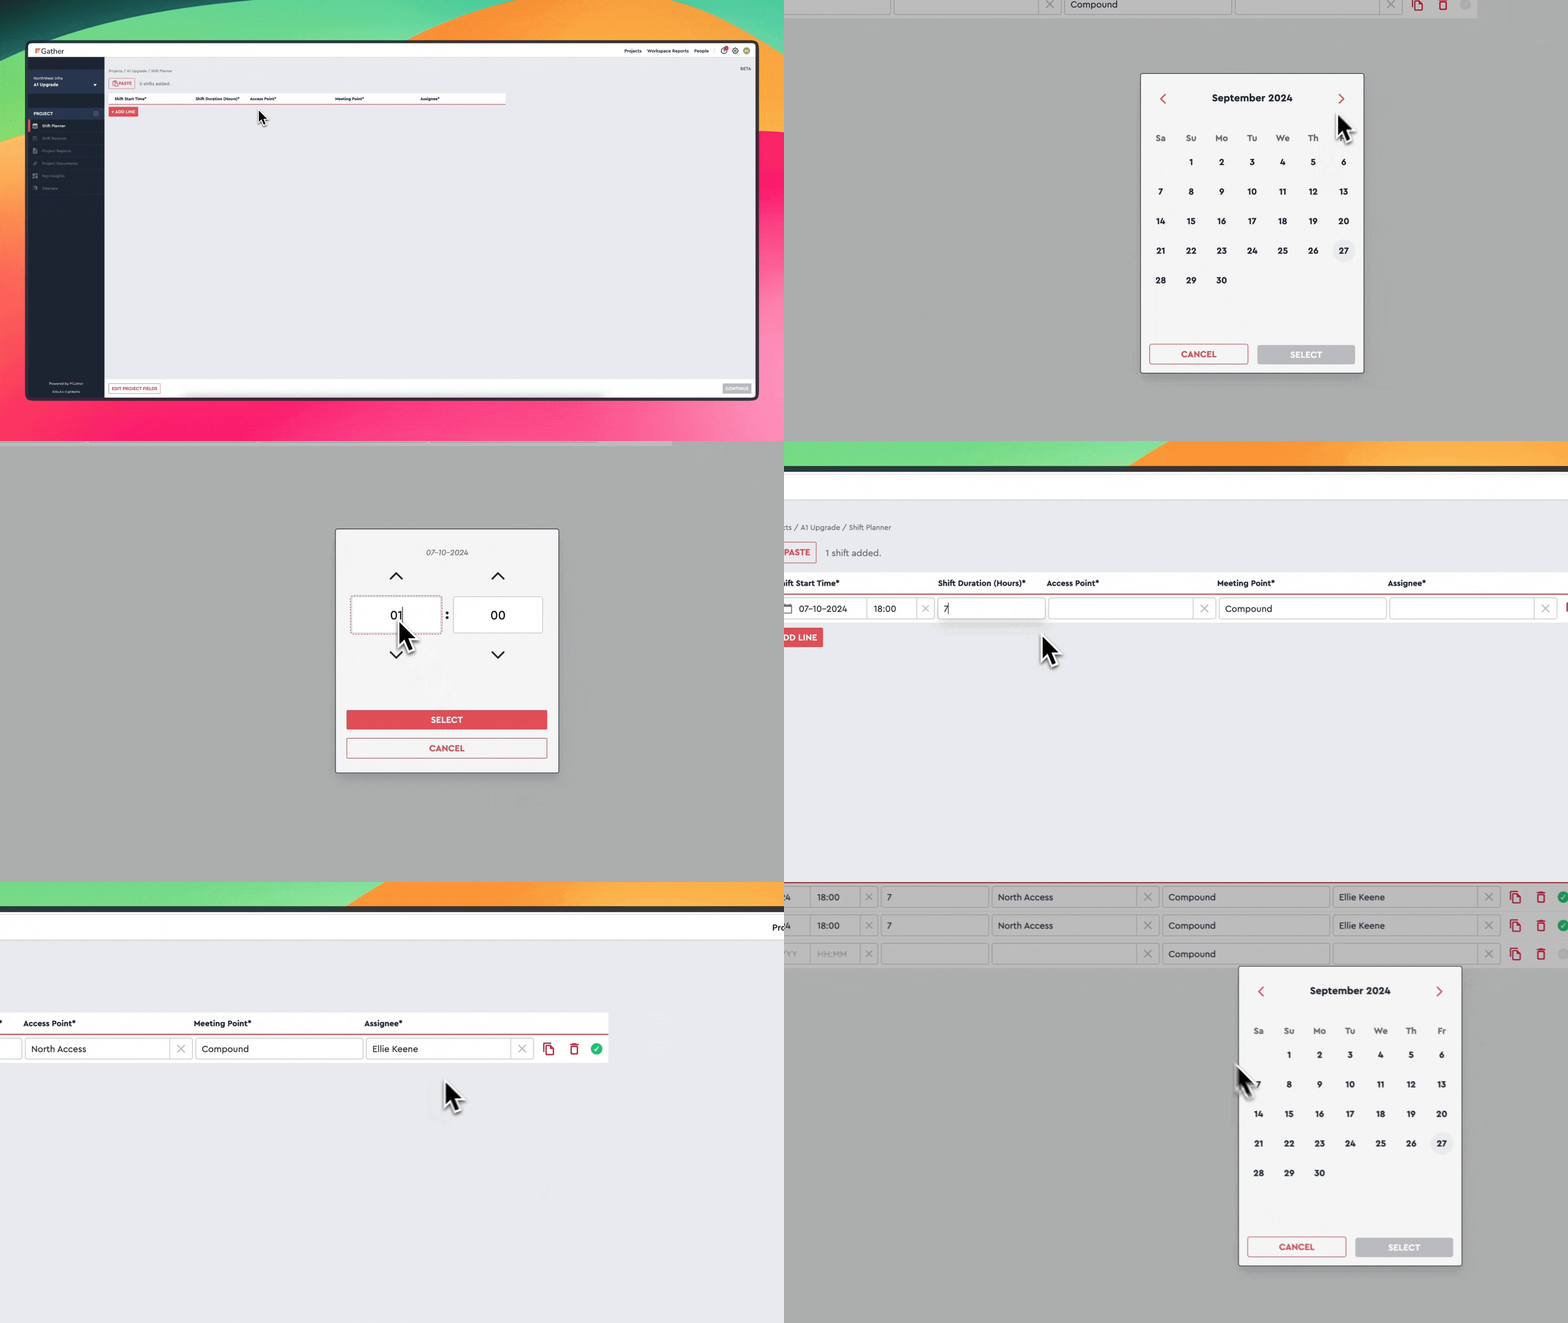
First, choose the relevant Project you would like to plan a shift for. From here, you can either click the Shift Planner icon in the dashboard or click on Shift Planner on the left-hand menu.
You will now be taken to the shift creation screen, where you will need to add some basic Shift Information.
A green tick will then appear after completing the information indicating all fields are completed. To duplicate the shift, just click the copy icon or click “+ ADD NEW LINE”.
The fields you will need to fill out are the following:
Shift Start Time
Shift Duration (Hours)
Access Point
Meeting Point
Assignee
Access Information

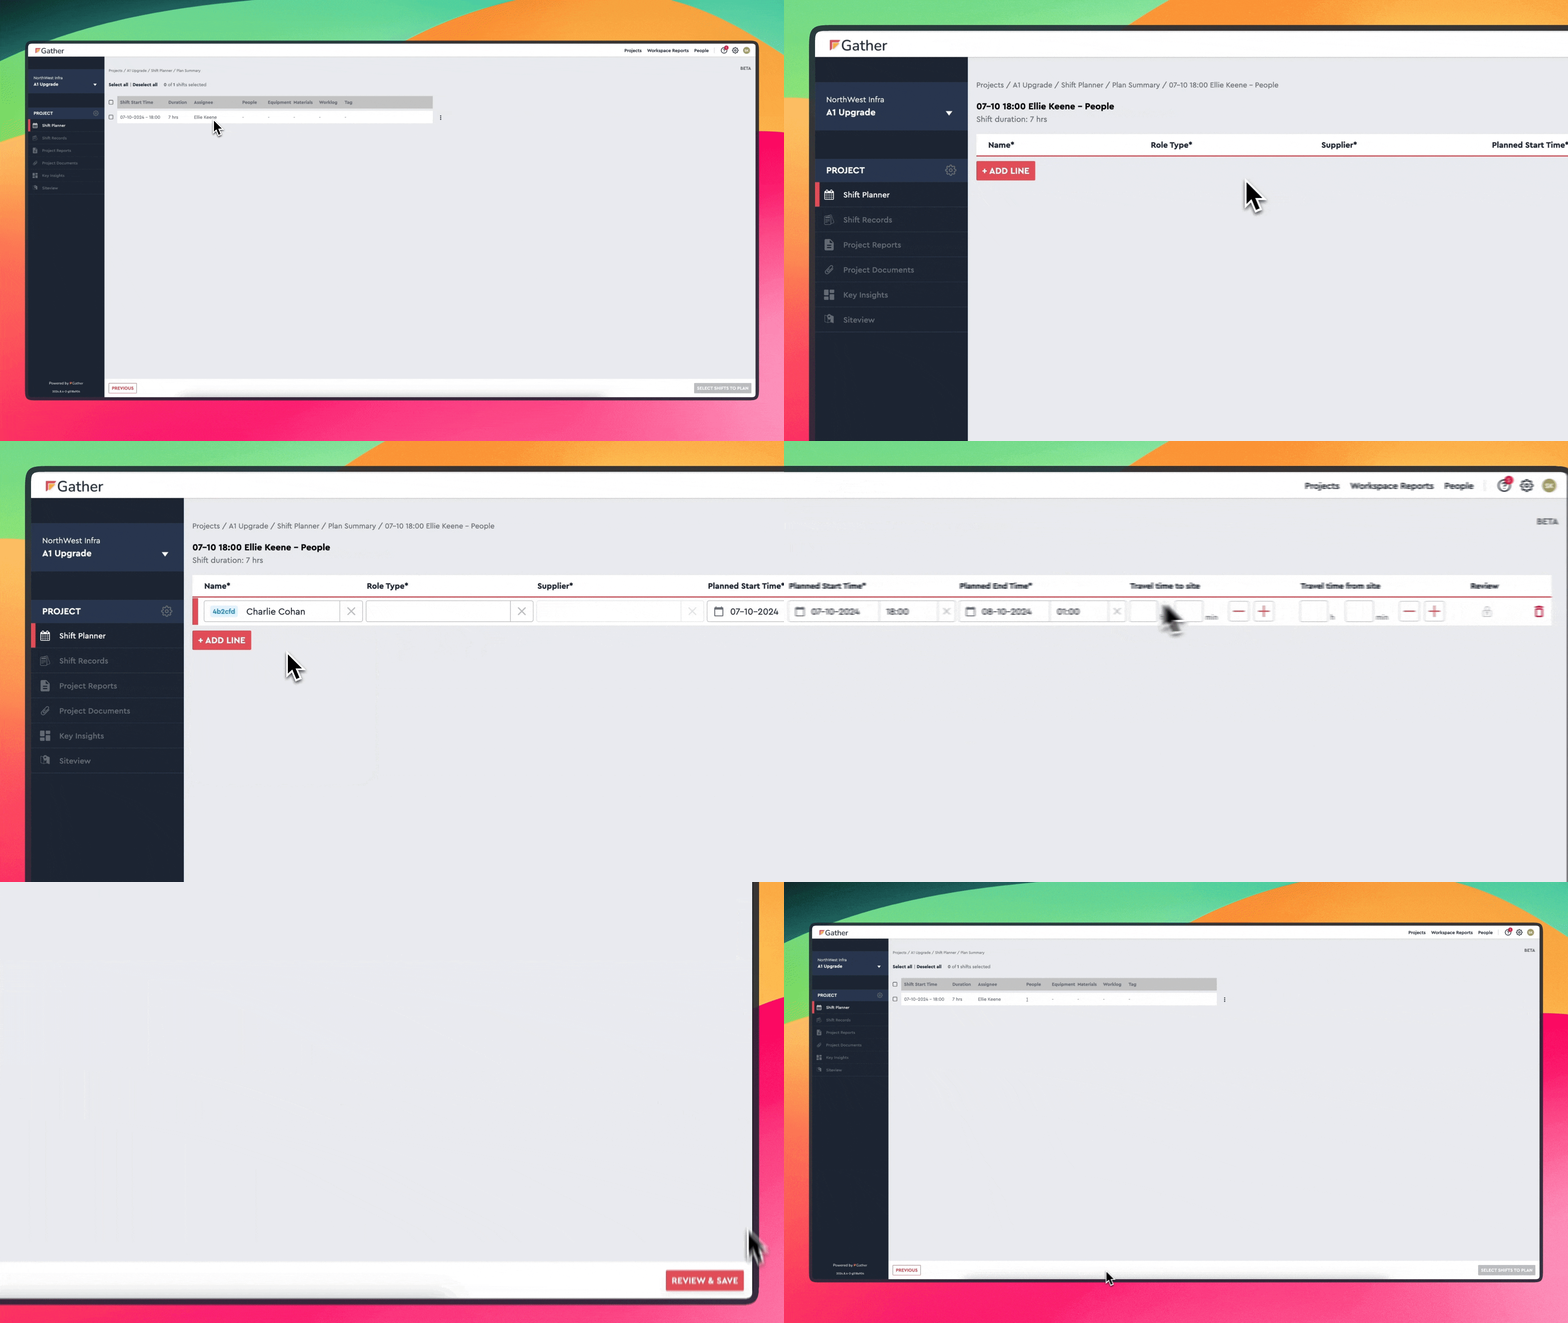
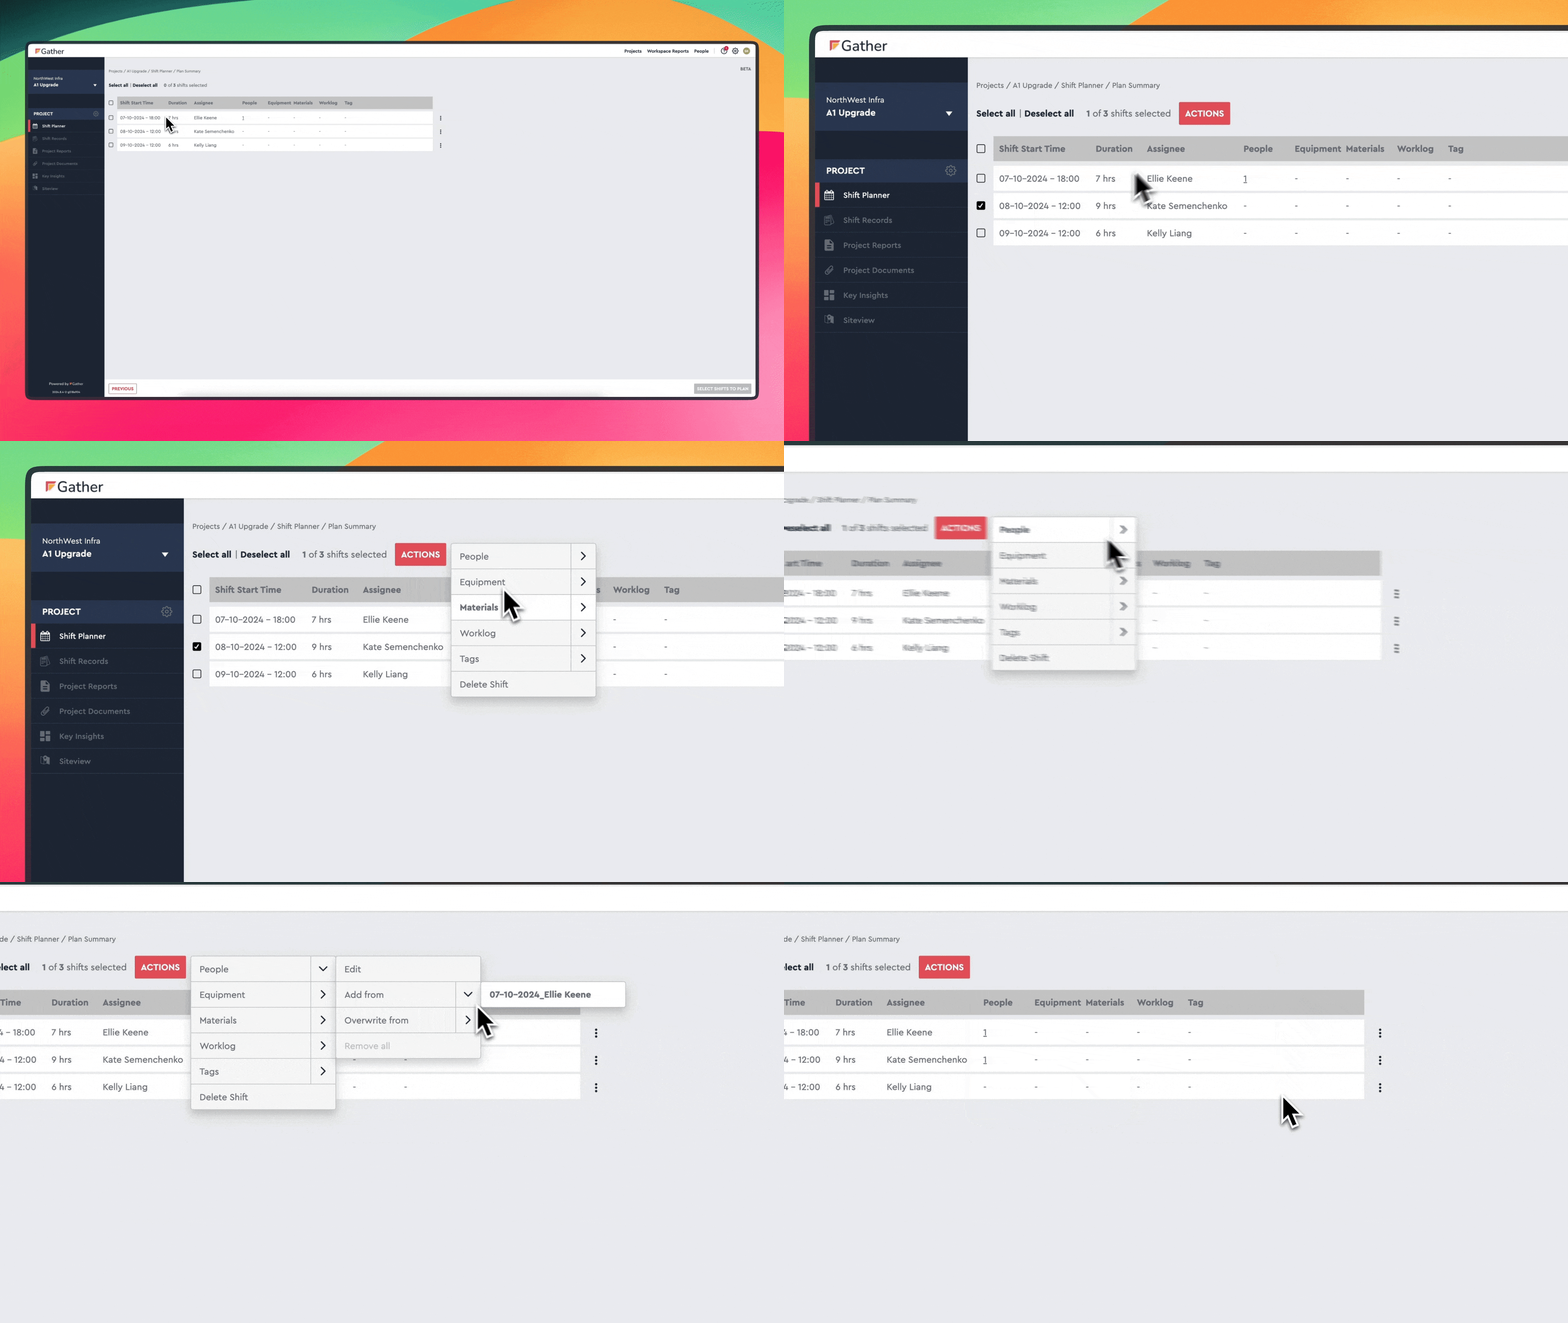
You can now click “CONTINUE” and add information to the following sections (available sections may change based on your configuration):
Access
People
Equipment
Material
Worklog

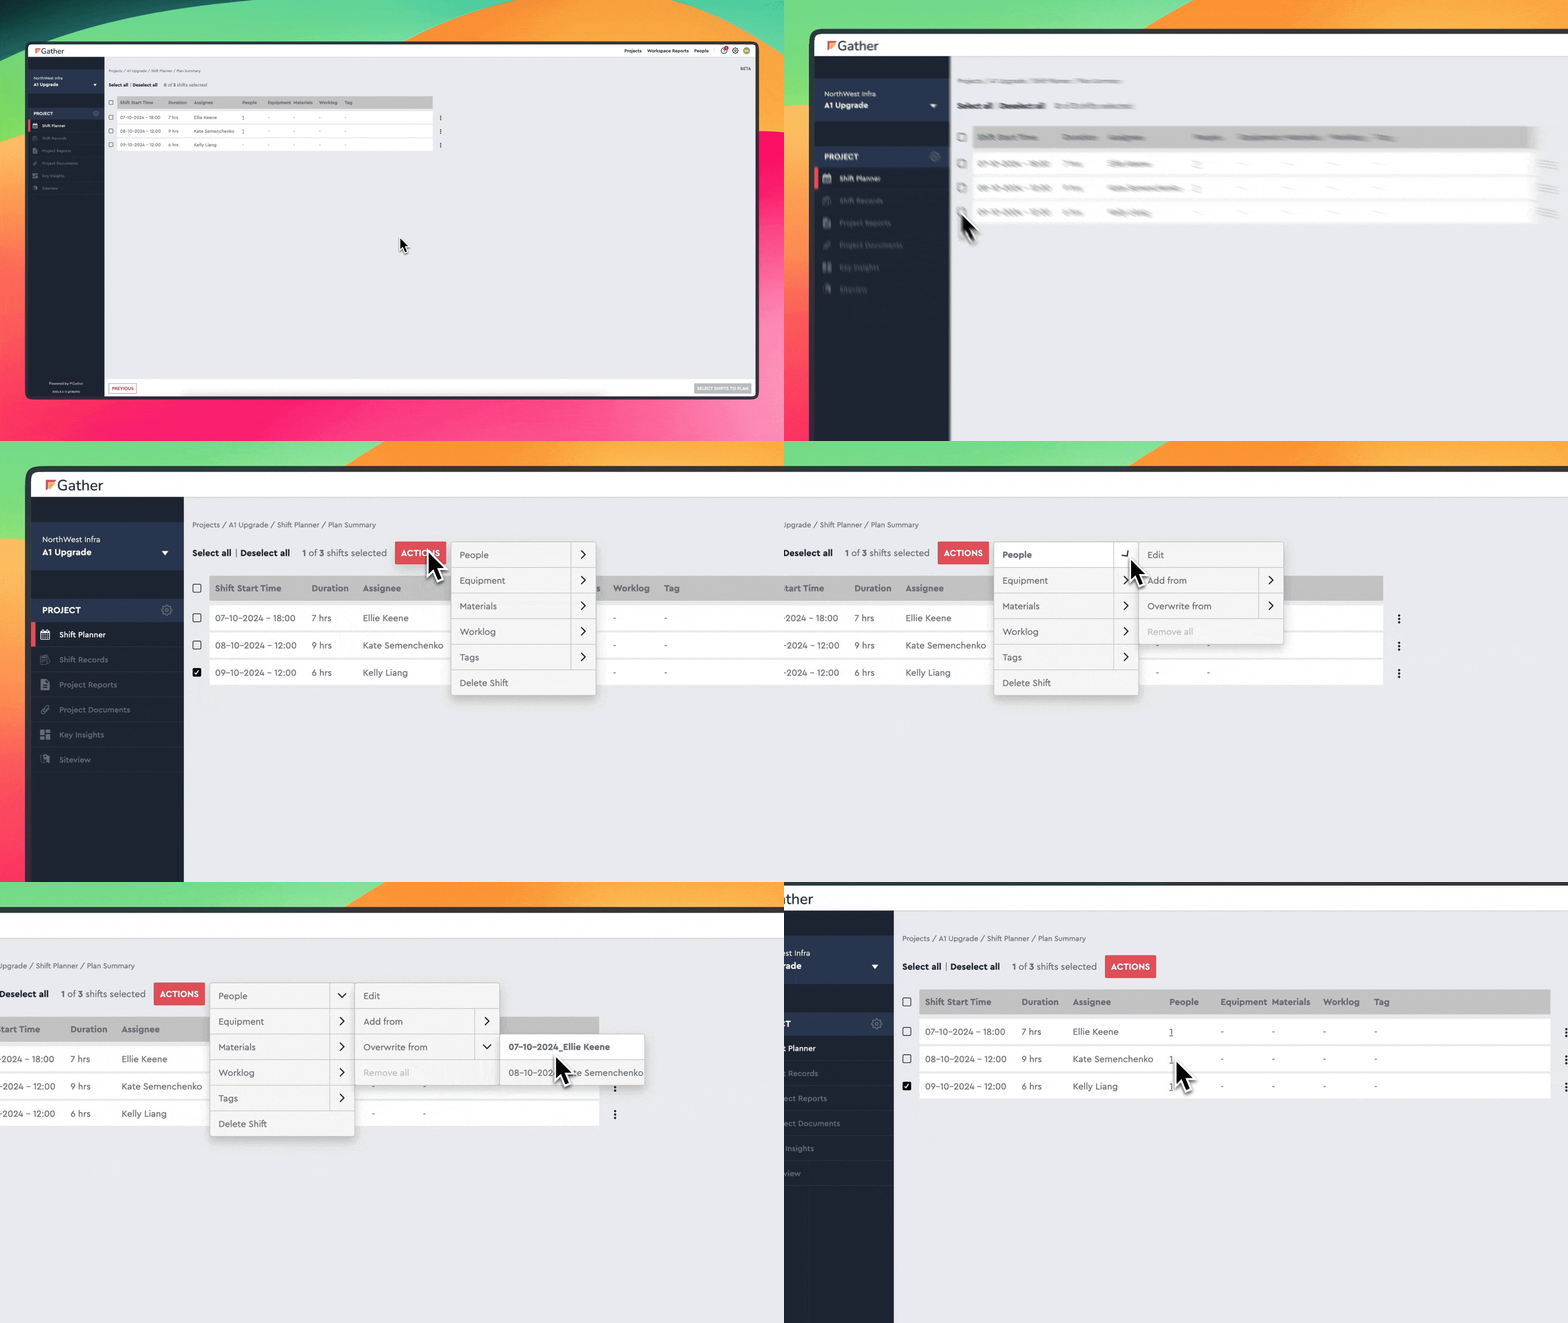
To enter this information into multiple Shift Records, tick the box next to each Shift Record then click "ACTIONS". Here, you can fill out this information for all the Shift Records selected, add Tags or delete any unwanted Shift Records.

To overwrite data from another shift, click on the "Overwrite from" option and select the shift that you want to overwrite data from.

When you have completed all steps you can choose which shifts you would like to "UPLOAD" by clicking the boxes on the left-hand side.
All shifts that you don't upload will still be available to upload later.
Your uploaded Shift Records will then appear with the status "AWAITING ACTUALS", ready to be completed.
If you stay logged into your Gather account and don't want to upload shifts immediately, you can leave the page and come back at a later time to upload shifts without them being deleted.
If at any point you would like to edit Project fields, you can do so by following the instructions in the following help article...
Project Datasources
Customising Dropdowns in Gather Projects